Creating a Facebook Business Page
Let’s get into account set up which includes building up your business using Facebook; setting up a Business Page, adding photos, adding videos, adding comments, notes, and the advertising account set up. This is the business side of Facebook that most people don’t dive into.
You’ve created your account and by now you should have added a photo for your own profile, added some work information, added some school information, and add some interest.
How to set up a Facebook Business Page
It’s very tricky if you don’t know what you’re doing. So what you’re going to do is to go down the bottom of your Facebook Profile Page where it says “Help”.
Help is a really useful resource. You can use this for a lot of different things. What you have to look for is “Pages for Businesses”.
- Click on this and this will take you to the help center for Facebook Pages.
- Click on “Creating and administering your Page” and click on the question that says “How can I create a Page?”
- Click on that and that will take you to a link that shows you exactly where you can create your page. It says “If you are the official representative of an organization, business, celebrity, or band, you can create a Page here to represent your organization on Facebook.”
- Click on the “here”.
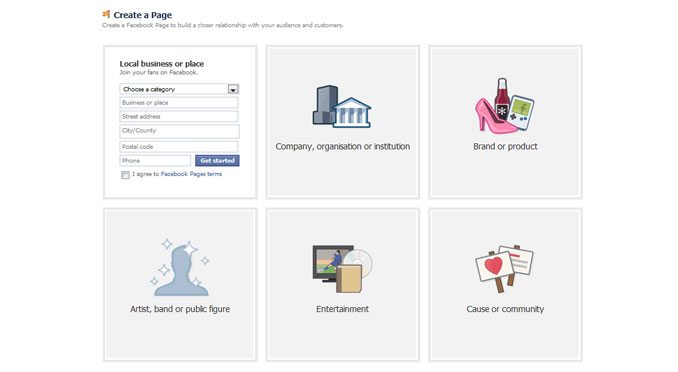
This will take you to a page where you want to create a Page. Select the “Official Page”. Do not create a “Community Page” because that is only for creating pages for a cause and Facebook will overtake your Page, meaning, you will lose administrative control over it. - In the “Official Page”, this is where you’re gonna be communicating with your customers and your fans by maintaining your Facebook Page.
- You can create a page for:
- Local Business
- Brand, product, or organization
- Artist, band, or public figureIt is up for you to decide what you want to handle this. It’s really going to depend on you.
- Select which type of Business you want. For example, by selecting a “Local Business” you will be asked to enter the kind of local business you have.
- Check off the box that says: “I am the official representative of this person, business, band or product and have permission to create this page.”
- If you have questions, you can read the “Facebook Terms”. You cannot create a page of a business you do not own.
- Click on “Create Official Page”.
You have now created a Page. It’s completely sorted and it’s ready.
Facebook Profile Image

You can now upload an image. You can choose to upload an image of yourself, a close up of the business logo, or your products. You can choose to “Upload an Image from your Computer” and it becomes automatically set as your profile picture. You can change that anytime by just clicking on the “change picture” icon on the upper portion of your profile picture.
The “About” section
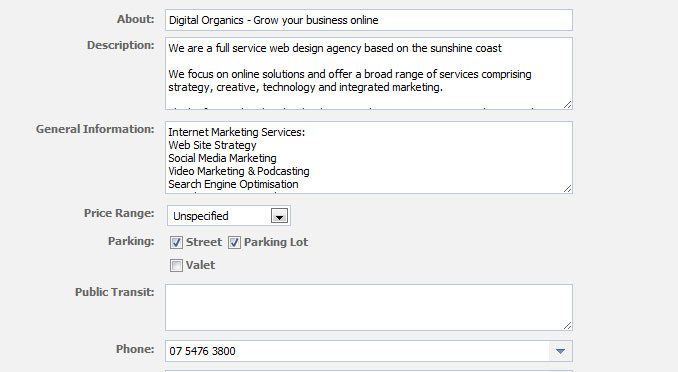
The very first thing you have to write in the “About” box is your http url. Meaning you have to enter the whole clickable http url of your business. Then say whatever you want to say about your business. Also include your full email address so people can contact you. This is the very common way for people to get to your website so you obviously want to have that there so that people can learn more about your business.
Share with friends
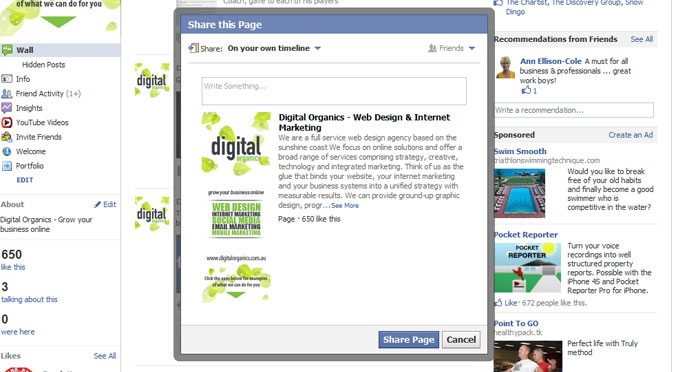
You can share your page to friends. Please use this very carefully. Suggesting a page to friends can be seen as very spammy. If your friends aren’t interested with your page then please don’t suggest it to them just to get fans. A lot of people receive suggestions and they feel like spams and a lot of people don’t really like it so be aware of that.
Clicking on the “share” button allows you to select to which friends you want to suggest your Page.
Tell your Fans
You can import your contacts from another subscriber base.
Post status updates
You can post an update. Clicking on the “Post Update” button, leads you to your Fan Page Wall. You can change the settings on what you would like to see on your wall.
- Your Page + others
- Just your Page
- Just Others
- Spam
It is recommended that you choose Your Page + Others to show other people’s posts too. This encourages more communication, and engagement on your page.
- Status
You can post your Status update on the “Write something” box. - Photo
Upload a Photo – this allows you to upload a photo from your drive and post directly on your wall.Take a Photo – this allows you to take a photo with your webcam which is very useful sometimes when you just know you need to upload a photo and want to do it quickly. - Video
You can also post a video.Record a video – you can record a video with your webcam and post it straight on Facebook.Upload a video – you can upload a video from your drive.
- Link
This is very useful when you want to upload a video from YouTube. You can do this as a Link. You can get a share link from your YouTube video and you can post it here. It will post a mini version of your YouTube video right in your Facebook stream.
Make sure to make 3 to 5 status updates every week. Include a photo update every week and video like once or twice a month. A combination of these can really provide a variety of information for your fans to connect with you.
Promote this Page on your website
You can add a “Like Box” to your website. This provides a step by step process on how you can exactly do this.
Set up your mobile phone
It is strongly recommended that you do this because it helps your business go mobile. This is all about market leadership and the more opportunities you have the better.
Once you’ve got your Fan Page up and going and you are successful with your Fan Page. Successful means that you’ve got fans that contribute, like your post, you’re getting some feedback and adding new fans regularly, that’s when you can take it to the next step. That’s when you can start thinking about having paid advertising for your Fan Page or for your website. So it’s really not recommended that you jump straight to the paid advertising but once your Fan Page is up and running. You need to have a lot of information and populate your page with interesting information and interesting posts to gain more Likes and that’s the time you can get into the advertising ppc section and set up there.
Creating a Facebook PPC Advertising
- To get to the advertising account, go to the bottom of the page and click on “Advertising”. This will take you to the Facebook page that is Facebook Ads.
- Click on “Create an Ad”. This will help you create an Ad from scratch.
- Type in your “Destination URL”. This is if you want to advertise a webpage. Just go in and type your complete destination url in the box.
- “I want to advertise something I have on Facebook.” button. This is if you want to advertise something you have on Facebook like your Fan Page. Your Fan Pages will come up and it will ask you which Fan Page you would like to advertise. It will also suggest that you will use the image on your Fan Page. If you don’t want to use the image from your Fan Page, then you can browse for a new image from your drive. The only thing you cannot change is the title of your Fan Page.
- Body Text – Create a text for your ad.
- Continue – completes the process and leads you to the next page.
Targeting
This is the section that you can target who you want to see your ad.
- Location – you can choose and narrow down your target location
- Everywhere
- By State/Province
- By City
- Demographics – choose your target market
- Age – choose whether your products and services are for target customers of a specific age of people.
- Sex – you can choose if for women, men or a mix of men and women
- Likes and Interests – you could type in here what kind of interests might your target customers have.
- Connections on Facebook – you can also target users that are connected to your pages or those who are not already connected to your pages.
The goal for selecting these things is to make sure that the Estimated Reach is about 200,000 people. That’s about the optimum number. You also want to make sure that you are selecting things that are relevant to your target market. It is up for you to decide if you want to widen your reach and adjust your selection. As you add more Likes and Interests, your Estimated Reach will go up.
Campaigns and Pricing
- Account Currency – select your preferred account currency
- Account Time Zone – Select your location and time zone
- Country/Territory
- Time Zone
- Campaign & Budget
- Campaign Name – You may change your campaign name to something more relevant
- Budget – Select your budget. It is suggested to lower down the budget to $10 per day for a start.
- Schedule
- Pricing
Notice something very sneaky that Facebook has done to us. It is tempting to just click “Review Ad” but please Don’t. Don’t bid on the amount that Facebook suggests you to bid because this is gonna end up costing you a lot of money. Opt for a much lower bid. This is a trick and they are very sneaky. They want us to make as much money as possible for Facebook.
- Set a Different Bid (Advanced Mode) – Click on this button. This allows you to enter a much lower bid. It is recommended to type in 30 cents.
- Ignore the warning. Facebook will give a little warning there but just ignore it.
- Review Ad – when done, click on this button. This takes you to the Review Ad section where you can review your ad for accuracy. You can change the name of your ad, and make sure your bid is correct.
- Place Order – when you think every detail is correct, click on this button.
It will then ask for you to fund it with credit card or with PayPal. You’re gonna pay for your Ad every single day so it’s up for you to decide whether you’re gonna pay through a credit card or PayPal. After selecting, click “Okay”.
For example, you selected Paypal. Clicking “Okay” will lead to a page where you have to log in and authorize the payment via PayPal. You need to authorize that Facebook can take money from your PayPal account every single day. You need to invoicing address and click on the button that says “Agree and Pay”. Automatically, your Facebook Ads will be charged to your PayPal account each day.
All Campaigns section is the Facebook page where all your ads and your campaigns will appear. And you will be able to track the results of your Facebook Ad in this page.